There are lots of reasons why one should have their services running over a publicly facing wireguard VPN server running on a cloud provider. I found that for the small price of $5/month it offers a lot of flexibility. It allows machines to communicate with eachother no matter where they are in the world. It adds a layer of encryption to those machines. Put a NginX reverse proxy on the public facing wireguard VPN server and you can have it route requests to the machines on the VPN. We can easily use this to create our own and private dropbox like service with Nextcloud, gitlab for our git repository, rocket chat for a private chat service, or even a jitsi server for voice communications. This sounds a bit confusing, so we need to take a look at what I'm talking about...
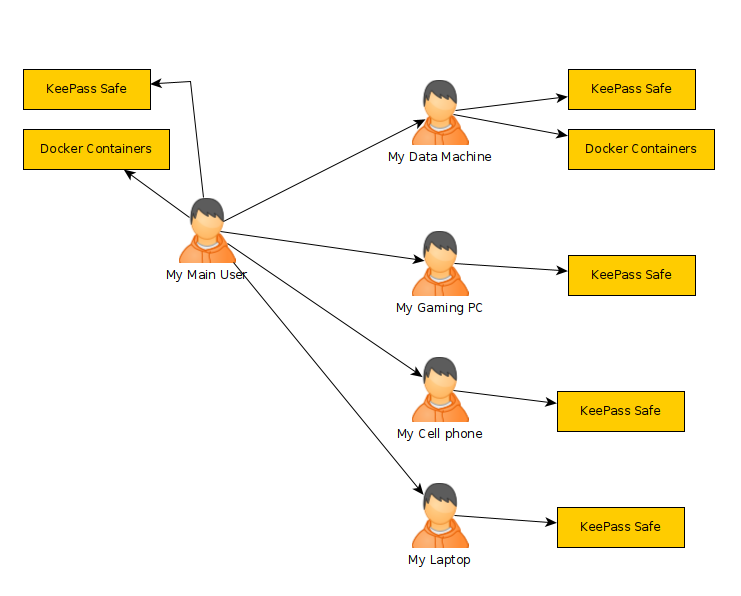
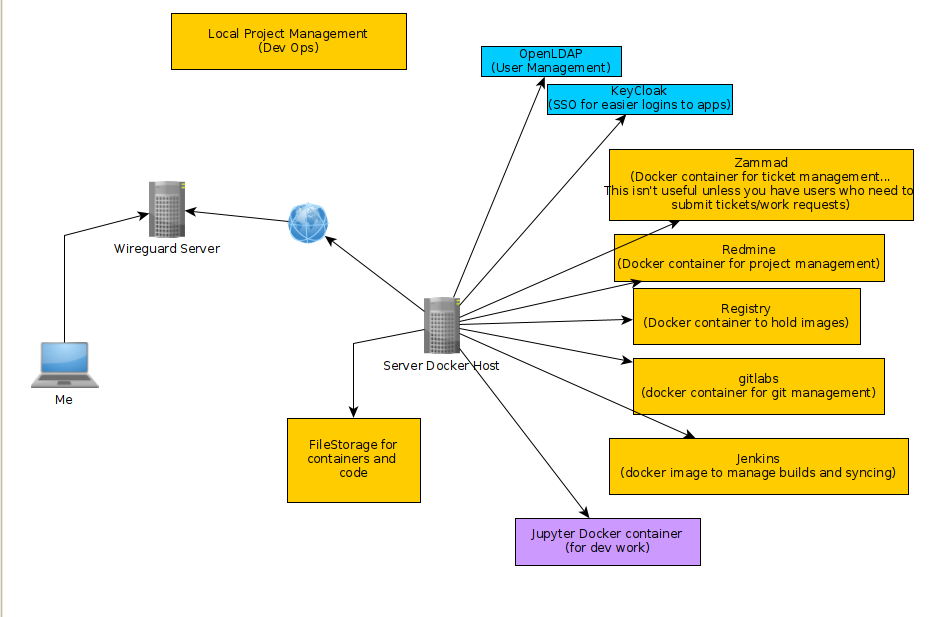
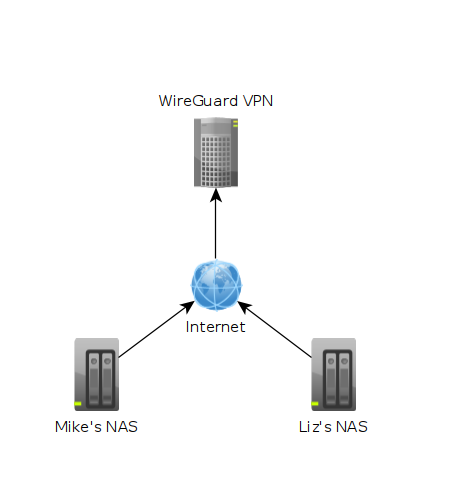 In the image above each machine is at a different location. One might be in Texas while another could be in Washington. The "Wireguard VPN" is the only one that we can directly talk to on the internet. In other words, it's the only one exposed publically. This machine is running on a cloud provider such as vultr.com or you can run it on amazon's cloud too. Vultr has machines with 1GB ram down to around $5, so I've been using them.
Another advantage to having that VPN server in the cloud is that we don't have to open any ports to our machines at home. This can be more complicated than people want to deal with, it exposes our home network, and some ISPs have strange setups making it hard or impossible to host services at your home. With the above image we can host services on the cloud, but the machines are really at home.
If we are talking about privacy, it's important to keep in mind at each location they have an ISP. This ISP can see the public facing VPN server and that it's a VPN, but can't see the packets going over it. You can use this same setup as a VPN for your web traffic, but in that case you'd set your clients to route all traffic through. In this article, we are only routing the IP traffic for the machines on the VPN.
If the VPN is configured to allow clients to talk with each other, we can have "Mike's NAS" ssh into "Liz's NAS" to do a file transfer with say rsync. This allows us to do remote backups. The catch here is that we need to make sure the cloud provided machine has enough data transfer limits for us to work within. Sometimes you'll see 1 TB/month other times it could be 2TB or more. If you need more space it's always possible to upgrade later, so don't worry too much about it.
Create the Domain Names
To create this kind of setup our first task is we need a dynamic DNS. I found namescheap to be a good option. I can't really show the details as this has lots of private information, but the idea is you use namescheap to buy your own domain name like "randomHomeServices.com" it may not even matter what name you choose if you are simply using it for your own services. You can choose "xyz123.net" We will eventuall create new "sub domains" and these subdomains allow us to have nextcloud.xyz123.net go to one address, and vpn.xyz123.net go to another. We can utilize this to allow us infinite number of urls if we need it. In this case, I only want "wireguard.zyx123.net" for our subdomain. This is the one we'll be setting up as our public facing url.
 What we can see in this image is that I own the xyz123.net on my account. That's the domain I own. I can add subdomains by clicking on "Manage" then click on "Advanced DNS". When the page loads click on "Add new Record" you want to make sure you pick "A+ Dunamic DNS Record" then for host you'd put the subdomain you want like "wireguard". When you try to access it, you would go to "wireguard.xyz123.net"... btw we aren't done on this page yet. We have to make sure we enable dynamic DNS clients...
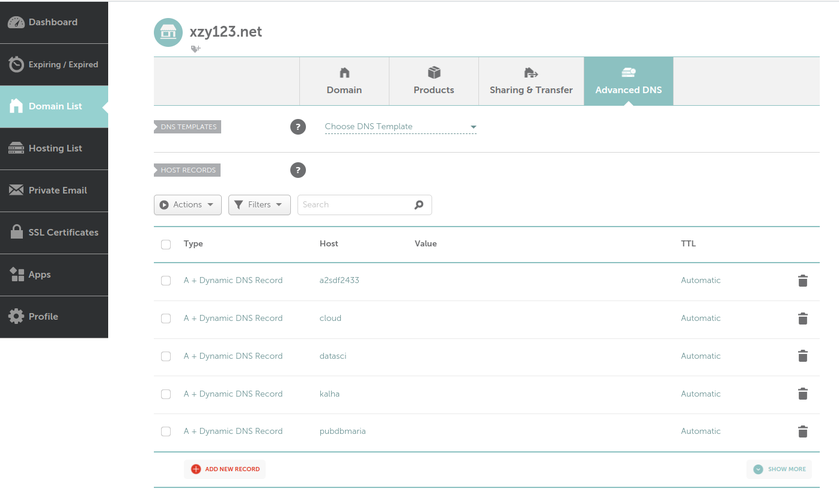
To enable dynamic DNS clients to update the IP Address in the value column, which is how machines know what the "wireguard.xyz123.net" points to. A quick note: All machines have an IP address to talk with eachother it's us humans who have a hard time remembering that ip address, so we use Domain Name Services (DNS) to make it easier for us to remember. That also means this Dynamic DNS is completely optional, but keep in mind our IP addresses can change randomly, which is another benefit to using dynamic DNS. When the IP changes it will be updated.
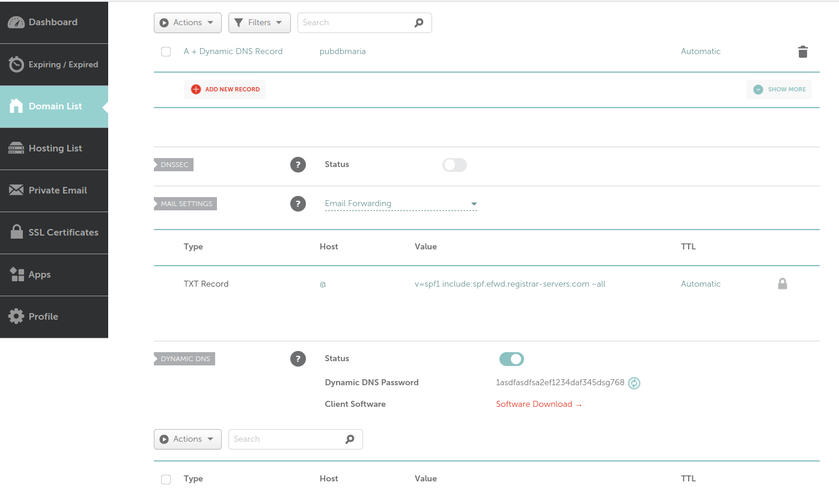
Any ways, scroll down the page to get to the option to enable dynamic DNS clients... we need to make sure it's turned on AND take note of that password. That password will be required for clients.
Now we have the domain name, the sub domain, and the dynamic DNS client, we can move to the next step and that is to get the server setup...
Creating the Cloud Server.
There are lots of cloud providers, but I have settled on Vultr.com. I was going to try linnode, but they wouldn't let me get an account since I use a VPN for my web traffic. Vultr offered the same services and what appears to be the same prices, so I have been quite happy with my choice.
At vultr.com, we want to create a very lightweight machine. It doesn't have to do anything other than host the wireguard VPN server, and in the future run NginX if we should desire to go that far.
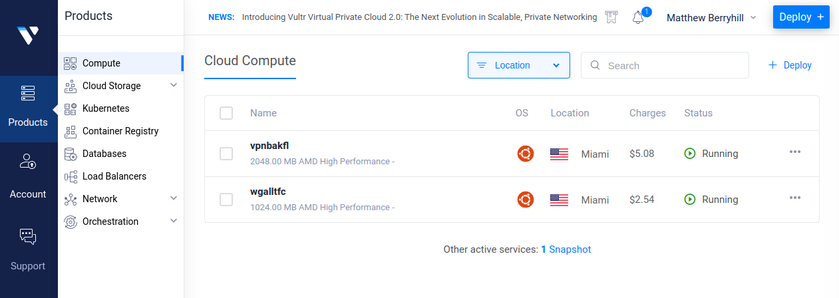
In the above image, you can see I own two machines. One is for the backup network that we are setting up in this article and the other I have my cell phone and some family member's on. The wireguard vpn I use for the cell phones, I route all of the network traffic over it. This hides the traffic from the cell phone providers sending it through the cloud service.
Anyways, to create these machines (the UI has changed a bit since I first created these machines) click on the "Deploy +" then the first item is "Deploy new machine" it will bring you to a page where you can select the machine you want. Keep in mind a few limitations we have to work with. We need to look at CPU cores, RAM, and network capacity.
For the server we want to host the cheapest option is all that is necessary, so pick the "cloud compute" server starting at $2.50/month.
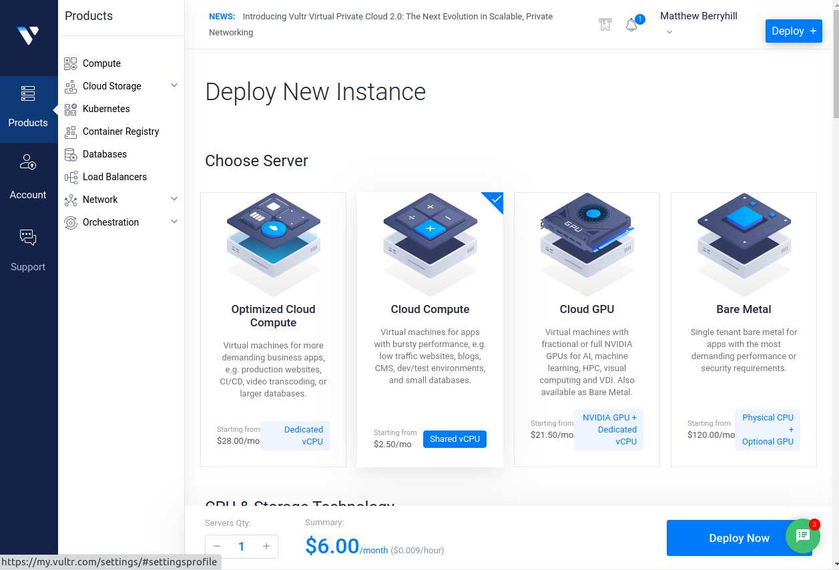
You can pick if you want AMD or Intel CPUs. I picked AMD Epic, but it looks like the Intel ones are also the same price, so either works. As you scroll down you'll see more options like where you want this machine hosted. For this, ideally you would want a location that is closest to reduce latency, but it often doesn't really matter that much. As you scroll down more you can get to the real important stuff...
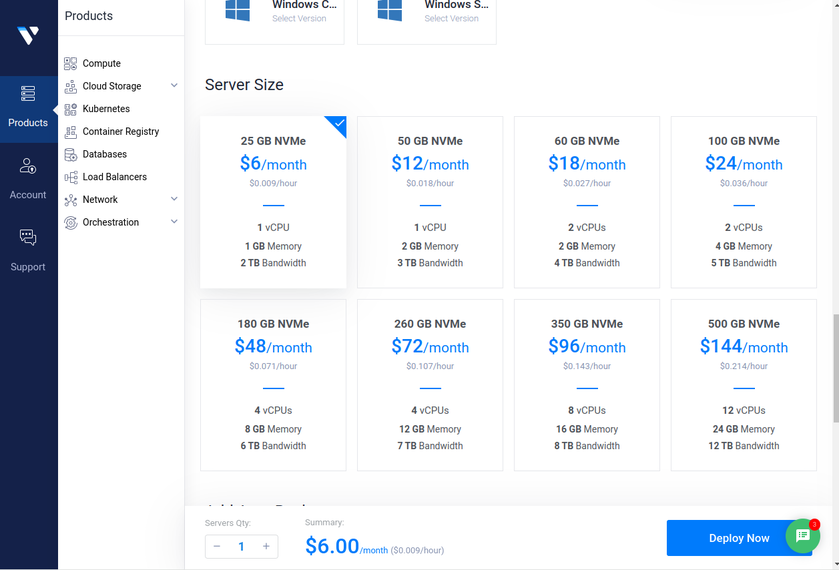
When we pick the "server size" we probably want the cheapest one we can get. These options do change based on the CPU we picked. If I said "Intel" I would get different options here, so the cheapest option I could find was $5/month and it was the "Intel Regular Performance"... for $1 more we do get more bandwidth, so I am satisfied here.
I haven't mentioned it yet, but we also want to have "Ubuntu LTS" version for our operating system. You could choose other operating systems if you want, but the commands later on will be different.
Just below, the "server size" you'll notice vultr automatically enables "backups", for this kind of setup we can get rid of that. You can always make a script to push backups down to one of the clients on the VPN then restore it manually if something goes wrong. In a production setup we might want to figure out how to do restores as fast as possible, maybe using snapshots, but in our case we don't need that. If someone is not able to access the VPN for a few minutes or even days it's not a problem.
This is where I should point out another nice reason to use dynamic dns... the machines can be set up to keep trying to connect to that dynamic DNS address, which can be moved to another machine. In other words, if our server gets hacked or deleted somehow, all of the clients are trying to connect to the wireguard.xyz123.net. We can create a new cloud machine, configure the DNS and the wireguard server...and the clients will reconnect like nothing happened. As long as I save my configurations I can restore them to any server I want. These backups can be hosted at the vultr.com site for some extra $, or I can just save them to one of my machines. I choose to save it to my machines. I do pay for snapshots back to when I first set it up, so that is helpful if something goes wrong. They can be restored in moments.
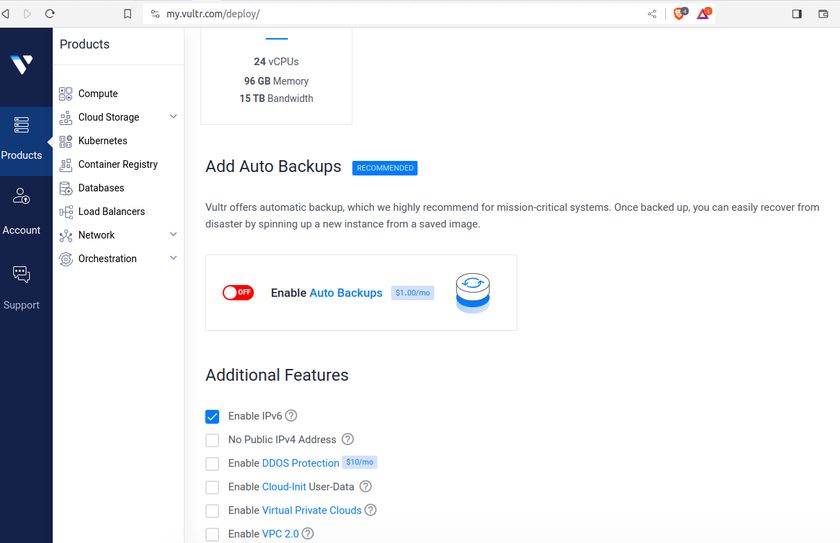
The "Additional Features" doesn't really matter much... there is another part where we can add ssh keys to allow us to remote into the root account, but I won't configure ssh keys for this article... let's keep it simple. At the bottom of the page we name the server. This name doesn't matter at all. Users are going to use the dynamic DNS name, so the name we choose here is only how we see the machine at vultr.com on the dashboard.
When you complete the purchase, you will have a new cloud machine. It takes a few minutes to set everything up, so let's leave the configurations to the next article...
https://crazycompute.locals.com/post/4860893/globally-available-home-network-part-2

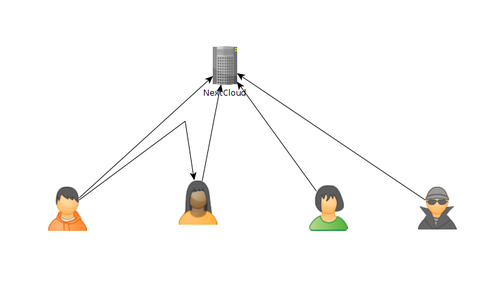 As of today, there are some issues with this syncing. First one is that if a user A shared their files with another user B, that user B will immediately start downloading the files whether they want them or not. There is a feature you can enable to prevent automatically downloading if the filesize is too large. This helps mitigate issues but not completely. If someone really wanted to mess with others they could create shares up to that limit and simply spam the targeted user forcing them to download a ton of files just under that limit... I think the fix to this is to default to always asking the user if they want to accept a share and what to do with it, or even simply accept it but don't auto download.